The Appointment List displays all appointments scheduled in Appointment Book for a selected date. The Appointment List is a useful tool to confirm appointments and displays the time, status, name of patient, provider, operatory, reason, length, and patient phone number for each appointment.
Note: Accessing the Appointment List requires the "Appointment Lists" security right.
To open and utilize the Appointment List
In Appointment Book, on the Appt Lists menu, point to Appt List, and then click one of the following options:
Current Clinic - To view appointments for the clinic that is associated with the current view.
Note: Accessing the Appointment List for the clinic that is associated with the current view requires the "Appointment Lists" security right.
All Clinics - To view appointments for all clinics.
Notes:
This option is available only if your user account has been granted the "View All Patients" security right (for the Central clinic).
Accessing the Appointment List for all clinics requires both the "Appointment Lists" security right (for the clinic that is associated with the current view) and the "Appt Lists, View All Clinics" security right (for the Central clinic).
My Clinics - To view appointments for all clinics to which you have been granted the "My Clinics, View" security right.
Notes:
This option is available only if your user account has been granted the "My Clinics, View" security right (in the "Practice/Clinic Setup" category) for at least one clinic other than the clinic that you are currently logged in to and if your user account has not been granted the "View All Patients" security right (for the Central clinic).
Accessing the Appointment List for all your clinics requires the "Appt Lists, View All Clinics" security right (for the Central clinic).
If applicable, do one of the following:
If the Password - Appointment Lists dialog box appears, user verification has been assigned to the "Appointment Lists" task. Do one of the following:
If your user account has been granted the "Appointment Lists" security right, enter your credentials in the User ID and Password boxes, and then click OK.
If your user account has not been granted the "Appointment Lists" security right, have a user with permission temporarily override this restriction so you can open the Appointment List this one time. The overriding user enters his or her credentials in the User ID and Password boxes and then clicks OK.

If a message appears, informing you that you do not have rights to this operation, your user account has not been granted the "Appointment Lists" security right. To have a user with permission temporarily override this restriction so you can open the Appointment List this one time, do the following:
On the message, click Yes.

In the Password - Appointment Lists dialog box, the overriding user enters his or her credentials in the User ID and Password boxes and then clicks OK.

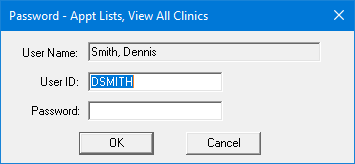
If a message appears, informing you that you do not have rights to this operation, your user account has not been granted the "Appt Lists, View All Clinics" security right. To have a user with permission temporarily override this restriction so you can open the Appointment List for all clinics this one time, do the following:
On the message, click Yes.

In the Password - Appt Lists, View All Clinics dialog box, the overriding user enters his or her credentials in the User ID and Password boxes and then clicks OK.

The Appointment List View dialog box appears.

To view only the appointments for a particular provider or operatory, select either a provider in the By Provider list or an operatory in the By Operatory list; otherwise, leave the View All checkbox selected to view appointments for all providers in all operatories.
Click OK.
The Appointment List window appears, and displays all scheduled appointments for the current date.

Perform any of the following tasks:
To see more information regarding an appointment or to make changes to an appointment, double-click it. The Appointment Information dialog box appears. Make any necessary changes, and then click OK.
To move
back one day at a time or forward one day at a time, click the left or
right arrow button  ,
respectively. To select a specific date, click the calendar button to
open the Select Date dialog box,
select a date, and then click OK.

To filter the appointments in the list by provider or operatory, click View on the menu bar to open the Appointment List View dialog box, select either a provider in the By Provider list or an operatory in the By Operatory list, and then click OK.

To move a selected appointment to the Pinboard for quick rescheduling, on the Appt menu, click Move Appointment to Pinboard.
To break a selected appointment and move it to the Unscheduled List, on the Appt menu, click Break Appointment.
To delete a selected appointment permanently, on the Appt menu, click Delete Appointment.
To copy the displayed list to the Windows Clipboard so that you can paste the information into other Windows programs, on the Appt menu, click Copy to Clipboard.
After confirming a selected appointment, on the Status menu, select the appropriate status type to indicate the last contact with the patient.
To open the Office Journal of the patient that corresponds to a selected appointment, click Office Journal on the menu bar.